SDK
Software Development Kit
Introduction
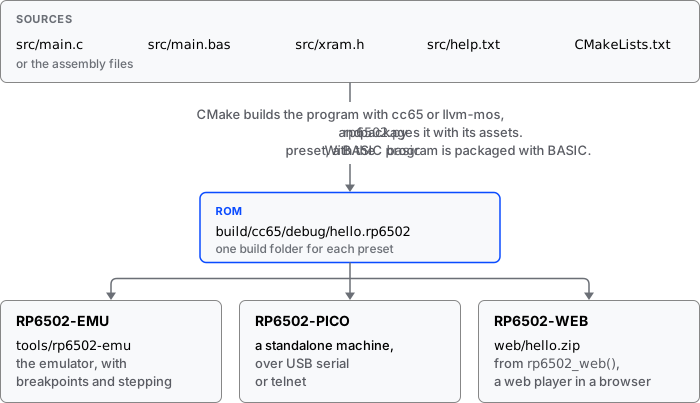
Picocomputer software is distributed as a ROM: one file ending in
.rp6502, such as game.rp6502. A ROM describes the state of the
machine as it comes out of reset: the program and data are in memory,
and the reset vector points to where the program begins. A single ROM can
hold every piece of code, video and audio your game needs.
If this sounds a lot like the cartridge ROM of a game console, or the BASIC ROM in your 8-bit home computer, that’s not a coincidence.
The SDK builds a ROM, runs it with the RP6502-EMU, an RP6502-PICO or the RP6502-WEB, and debugs it in the RP6502-EMU while it runs. A project starts as a copy of the RP6502 project template, which builds with either of two 6502 compilers, cc65 or llvm-mos. The template includes the same “Hello, world!” program four times: in C, which builds with either compiler; in the assembly syntax of each compiler; and in BASIC.
Installing the Tools
Building Picocomputer software takes VS Code, CMake 3.21 or later, Python 3, git, Make or Ninja, and one or both of the 6502 compilers, cc65 and llvm-mos. Only the compilers have to be recent. New Picocomputer features are often added to cc65 and llvm-mos before their next release, and the versions in package managers such as apt and Homebrew are too old.
Each compiler is installed with one command. The command downloads the
best build at the moment, from the upstream project or from the
Picocomputer fork of it. Which one is used, and why, is shown on the
Picocomputer GitHub page. The
compiler goes in the .rp6502 folder in your home folder, and its
bin folder is added to PATH, the list of folders where programs are
looked up. Running the same command again updates the compiler, and it
also switches between upstream and the fork when the recommendation on the
GitHub page changes. These compilers have a changed rp6502.h, so a
project written for an older one may need the changes in Upgrading an
Older Project.
Windows
Open PowerShell and install the tools with winget:
winget install -e --id Git.Git
winget install -e --id Kitware.CMake
winget install -e --id Ninja-build.Ninja
winget install -e --id Microsoft.VisualStudioCode
winget install -e --id Python.PythonInstallManager
Close PowerShell and open it again, so the new PATH takes effect. Then install Python, make Ninja the build tool, and install the compilers:
pymanager install default
setx CMAKE_GENERATOR Ninja
irm https://raw.githubusercontent.com/picocomputer/.github/main/install/cc65.ps1 | iex
irm https://raw.githubusercontent.com/picocomputer/.github/main/install/llvm-mos.ps1 | iex
Windows has no Make, so CMAKE_GENERATOR makes Ninja the build tool of
every CMake project that names no generator. Close every PowerShell and VS
Code window before going on. For a project configured before this step,
run “CMake: Delete Cache and Reconfigure” from the VS Code Command Palette.
In WSL, follow the Linux steps instead.
macOS
Open Terminal and install Apple’s command line tools, which include git, Make and Python 3:
xcode-select --install
Download the macOS universal disk image of CMake, drag CMake to Applications, and add its command-line tools:
sudo "/Applications/CMake.app/Contents/bin/cmake-gui" --install
Download VS Code and drag it to Applications. Then install the compilers:
curl -fsSL https://raw.githubusercontent.com/picocomputer/.github/main/install/cc65.sh | sh
curl -fsSL https://raw.githubusercontent.com/picocomputer/.github/main/install/llvm-mos.sh | sh
Quit VS Code with Cmd+Q and open it again, because VS Code reads PATH only when it starts.
Linux
On Ubuntu and Debian, install the tools with apt. Ubuntu 22.04 and Debian 12 and their later releases have CMake 3.21 or later.
sudo apt install git cmake build-essential python3 curl
Download the .deb of VS Code,
and install it from the folder it was saved in:
sudo apt install ./code_*.deb
Give your account access to the USB serial port of an RP6502-PICO, and install the compilers:
sudo usermod -a -G dialout $USER
curl -fsSL https://raw.githubusercontent.com/picocomputer/.github/main/install/cc65.sh | sh
curl -fsSL https://raw.githubusercontent.com/picocomputer/.github/main/install/llvm-mos.sh | sh
Restart your session, so the new group and PATH take effect. Other
distributions have the same tools under other package names. On Arch,
the serial port group is uucp instead of dialout.
Getting Started
Install the tools first. The steps are in Installing the Tools.
1. Make a project. On the template’s GitHub page, select “Use this template”, then “Create a new repository”. GitHub creates a new repository with a copy of the template. Clone it and open the folder in VS Code.
2. Install the recommended extensions when VS Code prompts for them:
the C/C++ Extension Pack, which includes CMake Tools, to build;
LLDB DAP, to debug in the emulator;
Python Debugger, to run
tools/rp6502.py.
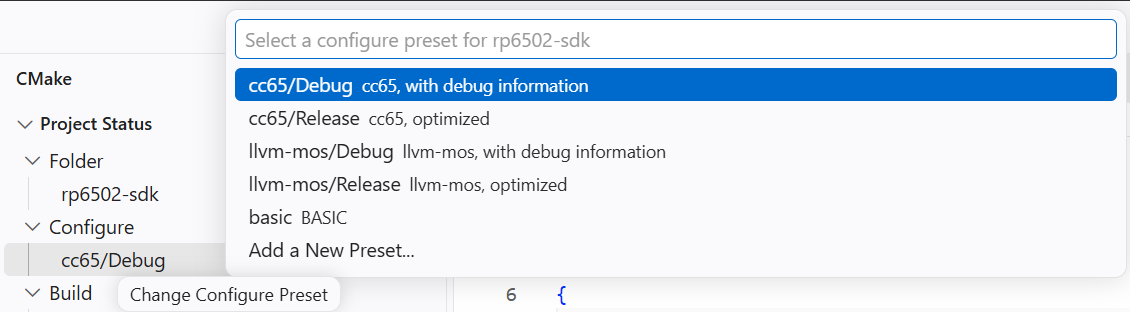
3. Choose a configure preset. The first time the project opens,
CMake Tools lists five presets. Four are for C, one for each combination
of compiler and build type. Choose a Debug preset, because breakpoints
and stepping require debug information. Release is the optimized build
for a ROM you share. The fifth, basic, is for BASIC: choose it, and
write the program in src/main.bas. The preset can be changed later
from the Configure row of the CMake side panel.
The first configure downloads the tools into tools/: the CMake
functions, rp6502.py, and the emulator for your system.
4. Press F5 to debug. VS Code builds hello.rp6502 and runs it in
the emulator. “Hello, world!” appears on the emulator’s screen and in VS
Code’s Debug Console. The session stays open after the program ends so
the screen can be read. Stop it with Shift+F5. The emulator window may
open behind VS Code.
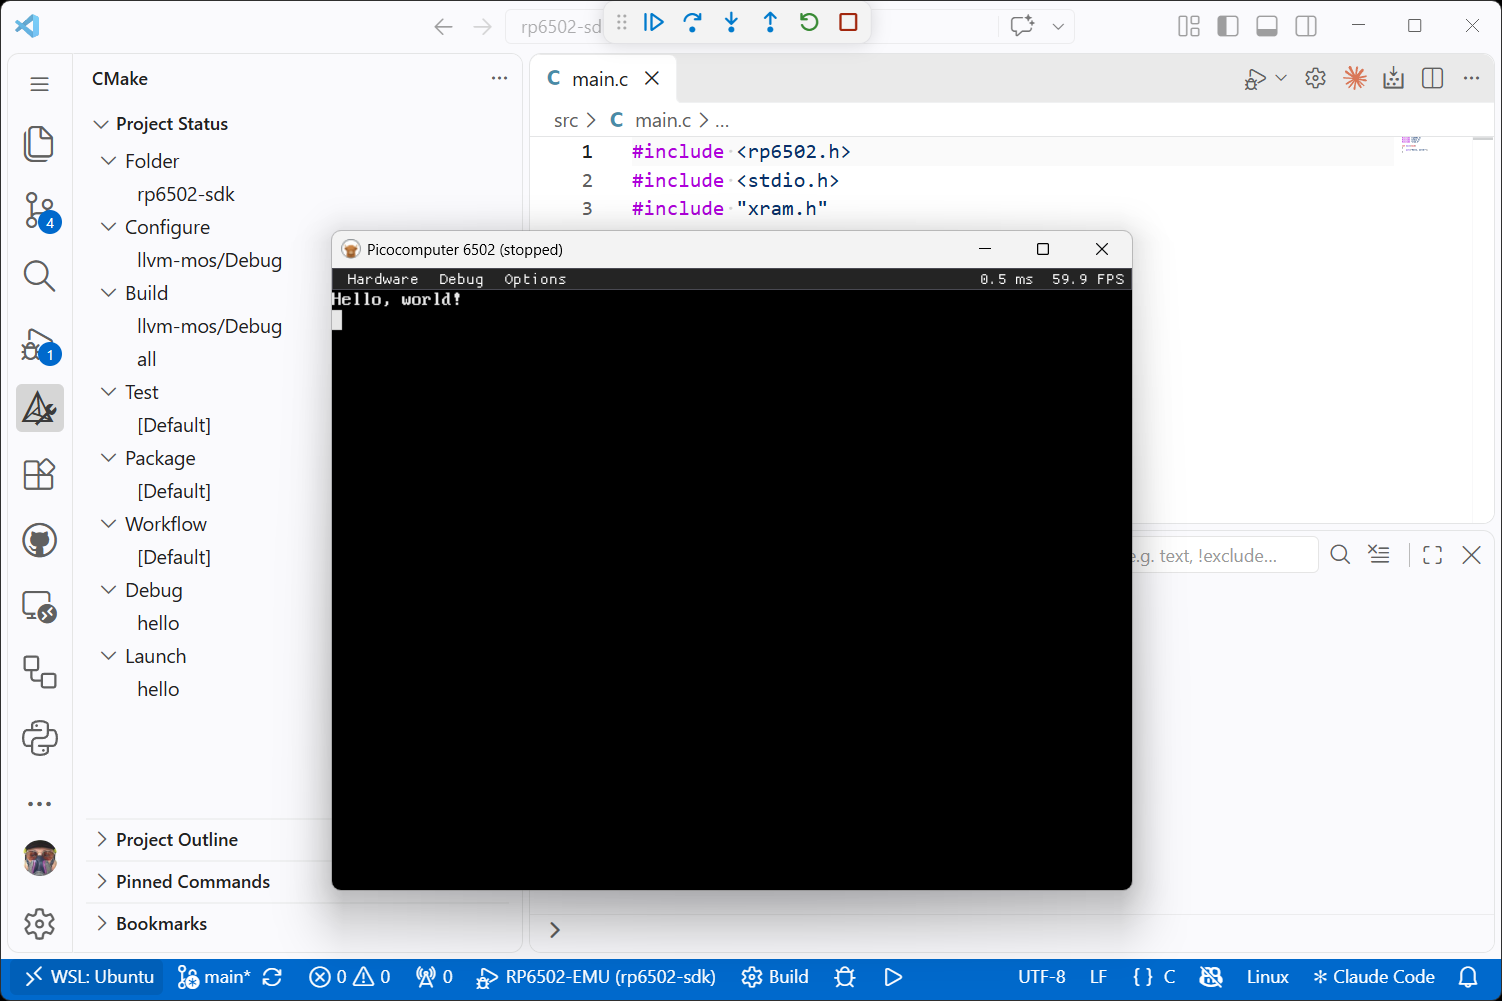
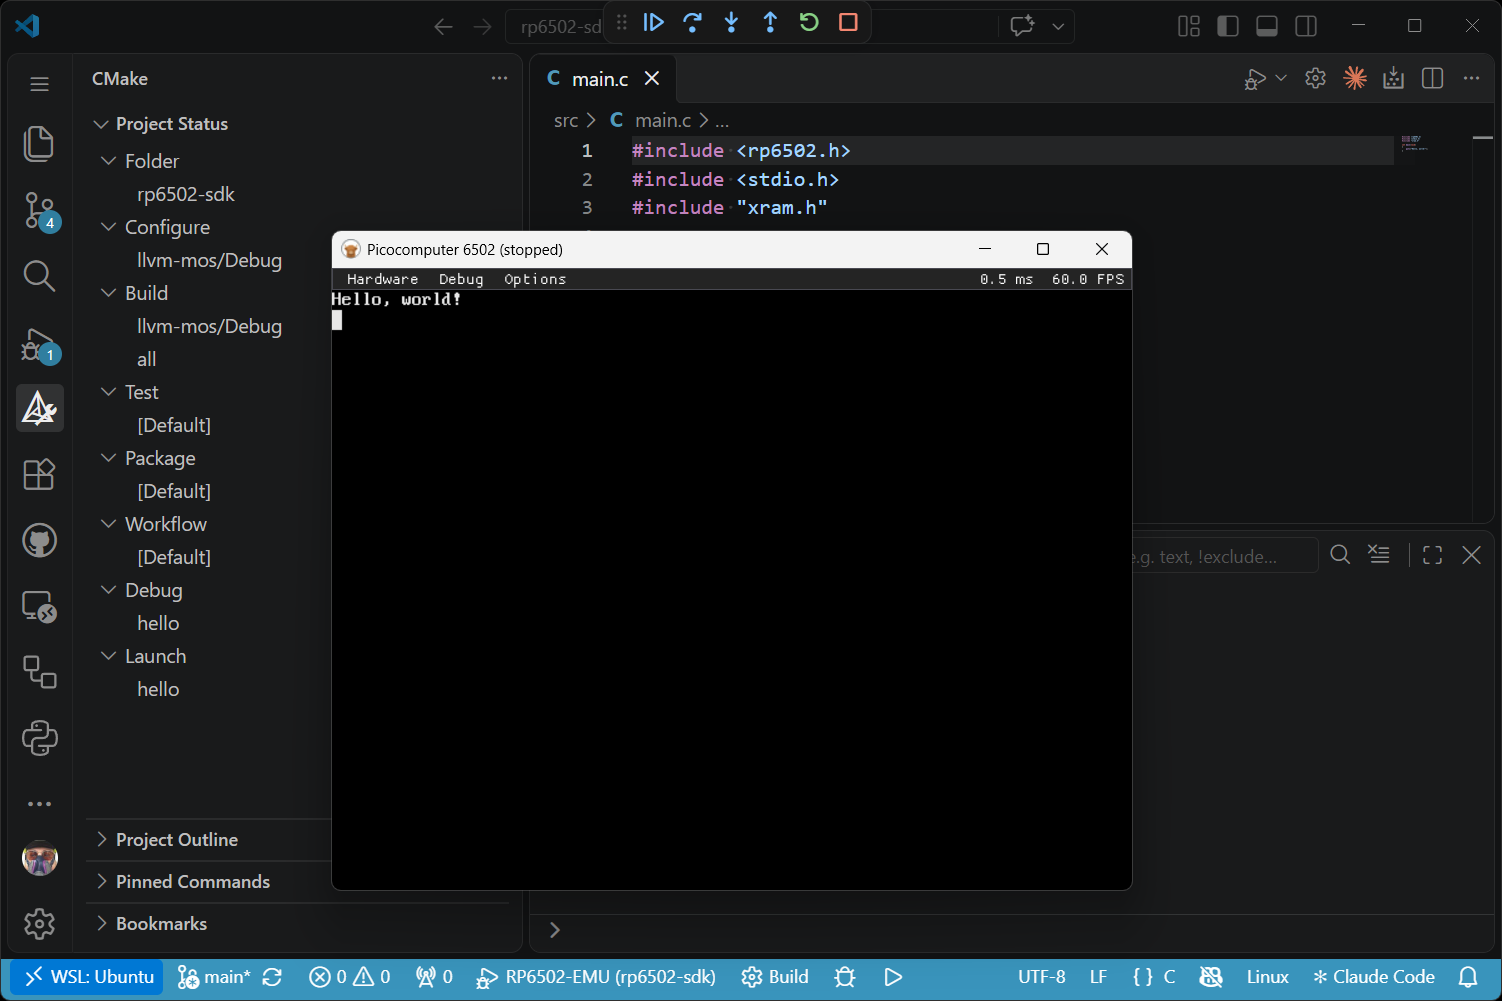
The project now looks like this:
my-project/
├── CMakeLists.txt         the ROMs this project builds
├── CMakePresets.json      the five configure presets
├── README.md              web player link, requirements, updating
├── .github/               GitHub Pages workflows
├── .vscode/               F5 configurations, tasks, extensions
├── src/
│   ├── main.c             Hello, world! in C
│   ├── main-cc65.s        the same in cc65 assembly
│   ├── main-llvm-mos.s    the same in llvm-mos assembly
│   ├── main.bas           the same in BASIC
│   ├── xram.h             the XRAM layout
│   └── help.txt           the help asset
├── tools/                 commit these
│   ├── rp6502.cmake
│   ├── rp6502.py
│   ├── cc65-toolchain.cmake
│   ├── cc65-config.cmake
│   └── rp6502-emu         the emulator, ignored by git
├── build/                 build output, ignored by git
└── .rp6502                the settings file, ignored by git
On Windows and WSL, the emulator is rp6502-emu.exe. The web player
linked in README.md is published to GitHub Pages by
.github/workflows/web.yml, as described in GitHub Pages.
To choose C, assembly or BASIC for the project, edit CMakeLists.txt.
Its if(RP6502_BASIC) has a branch for BASIC and a branch for C. Keep
the branch you want, and delete the other branch and the if(). For
assembly, keep the C branch and replace src/main.c in it with
src/main-cc65.s or src/main-llvm-mos.s.
Then delete the presets and source files you do not use. In
README.md, set preset: in the <!-- rp6502 comment to a preset
you keep.
Commit the tools/ folder, so every clone of the project builds with
the same tools. The tools change only when you update them, with the
“RP6502: update tools” task (Terminal > Run Task) or with
cmake -P tools/rp6502.cmake. An update replaces each tool file with
the latest version from the rp6502 repository, and local changes to those
files are lost. An update also downloads the latest emulator release. On
Windows, close the emulator before updating.
When tools/ has no emulator, the next configure downloads one, so a
fresh clone needs no extra step. If the release has no emulator for your
system, the configure writes tools/rp6502-emu.unsupported, which
names the missing build. Later configures don’t try again until the next
update. Build the emulator from the rp6502 repository, then set emulator in
The .rp6502 Settings File to its path.
Running and Debugging
“Start Debugging” (F5) runs one of three launch configurations. Choose which in the Run and Debug side panel.
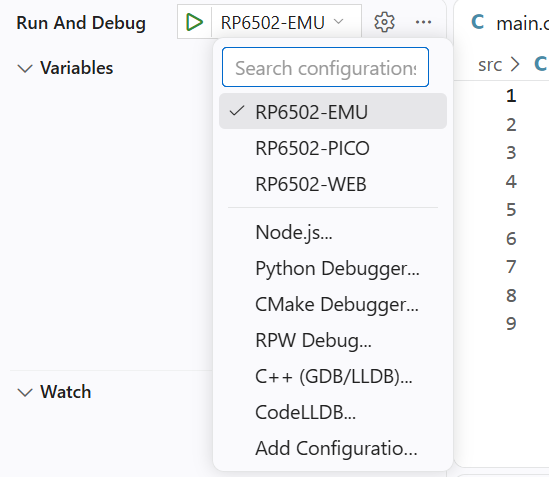
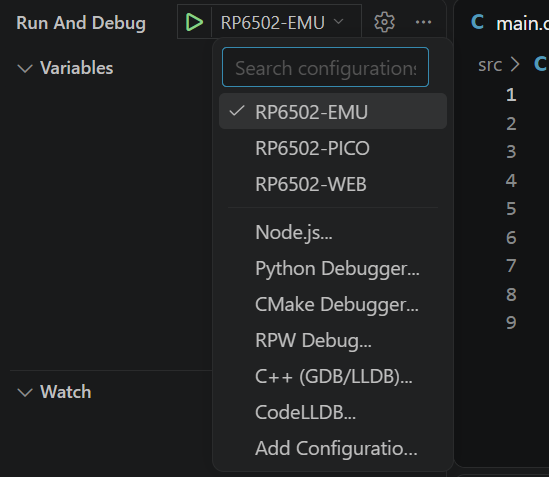
RP6502-EMU is the default. It builds the project and runs it in the RP6502-EMU with source-level debugging: breakpoints, stepping, the call stack, variables and watch expressions, all of which need a Debug preset. With llvm-mos, variables show their C types, and structures and arrays expand. With cc65, variables have no types, and each variable’s size comes from where its symbol sits in memory. Debugging in the emulator’s datasheet covers both.
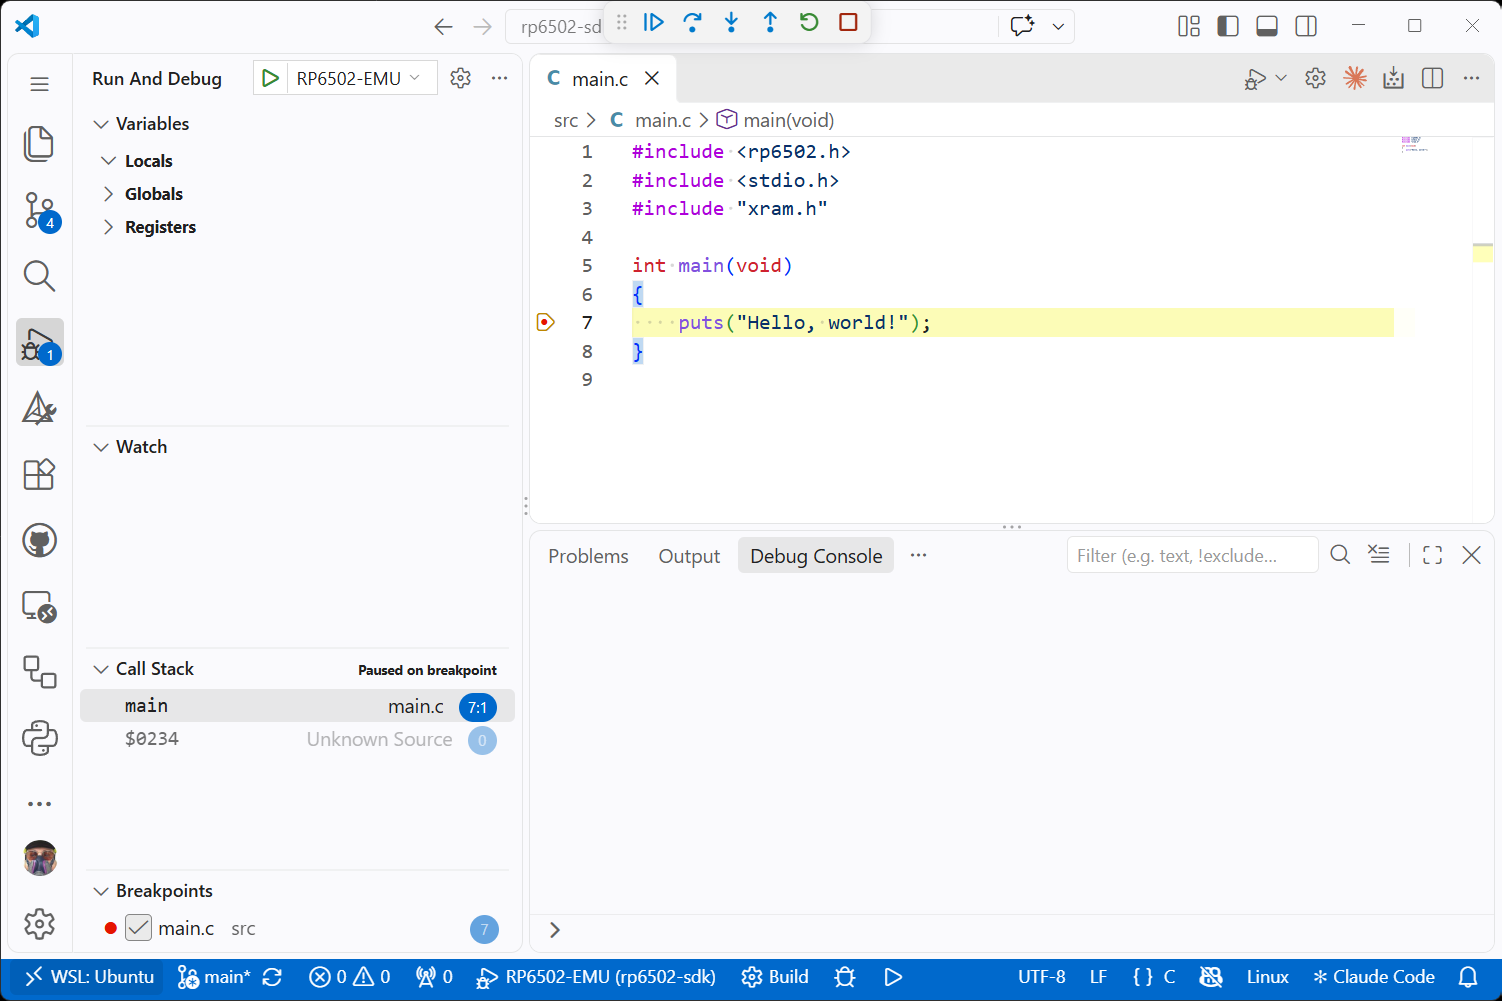
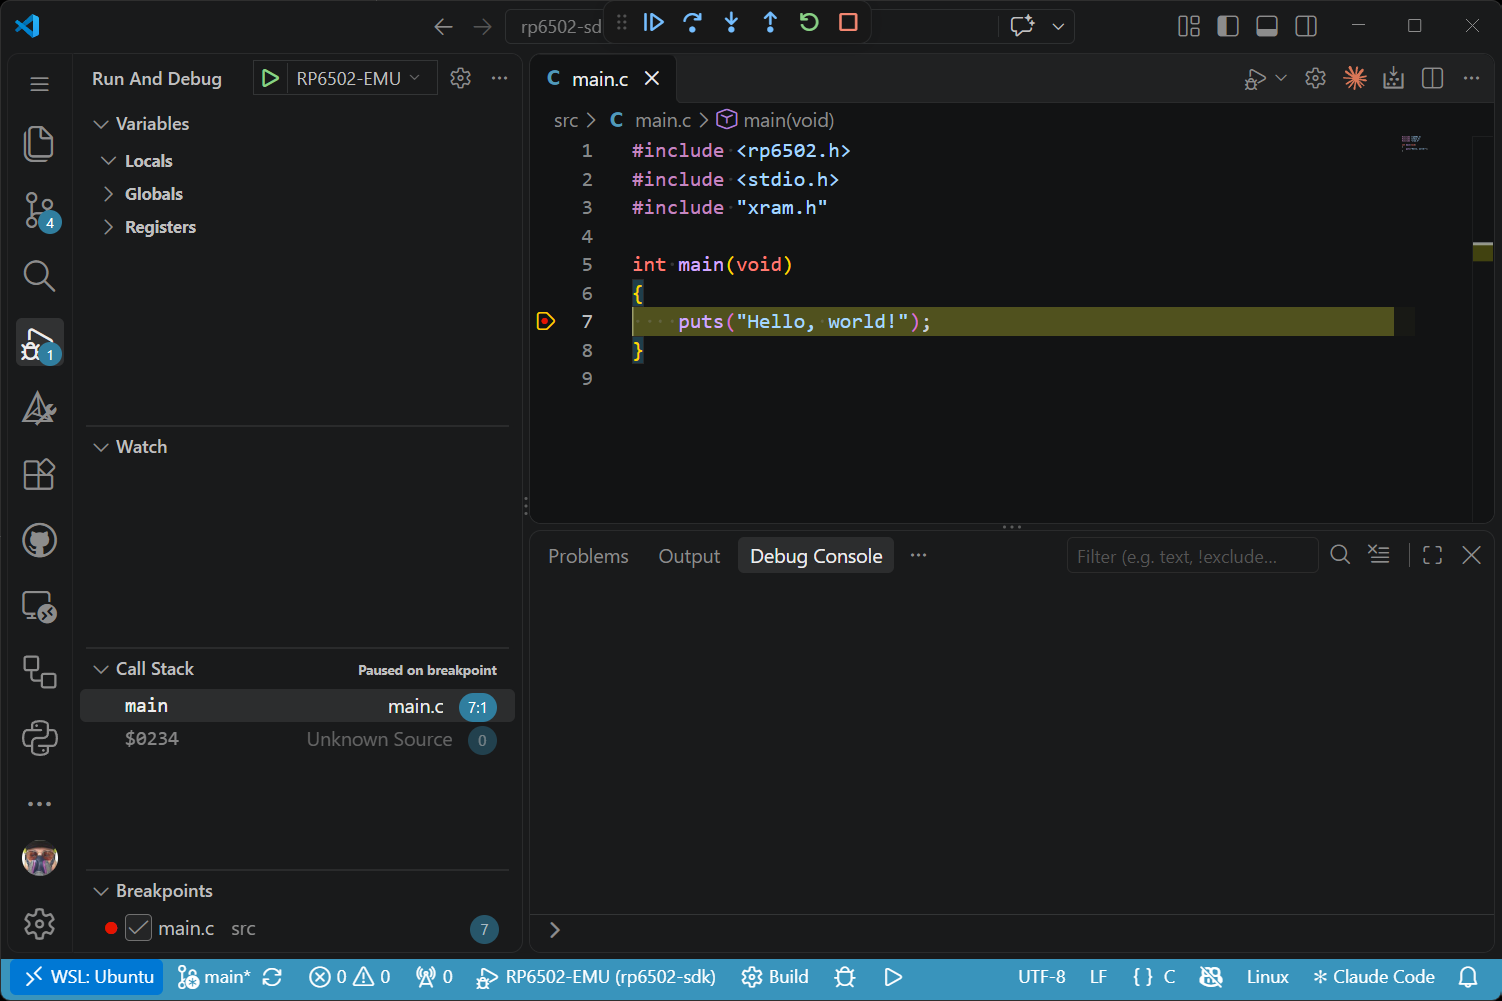
RP6502-PICO builds the project and runs it on an RP6502-PICO.
The connection is USB, through the USB port on the VGA module, or telnet
with an RP6502-PICO-W. First set device, and key for telnet, as
The .rp6502 Settings File describes.
The ROM is copied to the current drive and folder of the monitor, the
command prompt of the RP6502-PICO, or to the workdir folder when the
settings file sets one. It is loaded from there, so a USB drive must be
plugged in. The copy replaces any file with the same name. The program’s
console opens in a VS Code terminal. There are no breakpoints or stepping
on the RP6502-PICO. In the terminal, Ctrl-A then X exits, and Ctrl-A then
B sends a break. A break stops the program and returns to the monitor.
RP6502-WEB builds the project and opens a page in a browser with a
link to every web player that rp6502_web() makes, as Web Players
describes.
The .rp6502 Settings File
The settings file is named .rp6502 and is in the project folder. It is
not a ROM, although it has the same extension. It is created the first
time the tools run. To run on an RP6502-PICO, set device in the
[RP6502][Launch] section, and key as well for telnet.
[RP6502][Launch]
emulator = tools/rp6502-emu
device = /dev/ttyACM0
key =
workdir =
args =
term = True
Setting |
Description |
|---|---|
|
Path to the emulator: |
|
The serial port of the RP6502-PICO. A new settings file sets it to
the usual port for your system: |
|
Passkey for telnet. Leave it empty to use a serial port. See Telnet Console. |
|
Folder at the root of the current drive of the monitor where the
ROM is copied, such as |
|
Arguments for the ROM. The program receives them only when it
defines |
|
Open a terminal on the console when running on an RP6502-PICO. |
The emulator also saves its debugger window layout in this file, so each project reopens with its windows where you left them.
Building a ROM
CMakeLists.txt describes the ROMs a project builds. This listing is
the C branch of the template’s CMakeLists.txt, without the if().
BASIC projects are described in BASIC Programs.
cmake_minimum_required(VERSION 3.21)

include(${CMAKE_CURRENT_LIST_DIR}/tools/rp6502.cmake)

project(MY-RP6502-PROJECT C CXX ASM)

add_executable(hello)
rp6502_map(hello src/xram.h "XRAM_.*")
rp6502_asset(hello help src/help.txt)
rp6502_executable(hello DATA default RESET default)
rp6502_web(hello)
target_sources(hello PRIVATE
    src/main.c
)
include()loads the RP6502 CMake functions fromtools/.add_executable(hello)creates the program, a CMake target namedhello.rp6502_map()reads the XRAM addresses forhellofromsrc/xram.h. See Addresses in CMake.rp6502_asset()adds an asset to the ROM. See Adding Assets.rp6502_executable()packages the program and its assets intohello.rp6502, named after the target.rp6502_web()packages the ROM into a web player. See Web Players.target_sources()lists the program’s source files.
rp6502_map() and every rp6502_asset() come after
add_executable() and before rp6502_executable(). rp6502_map()
also comes before any rp6502_asset() that uses its names.
rp6502_web() comes after rp6502_executable(), because it packages
the ROM that rp6502_executable() defines.
target_sources() can go anywhere after add_executable().
The ROM is written to the preset’s build folder:
build/<compiler>/<debug or release>/, or build/basic/ for the
basic preset. The cc65 Debug build is build/cc65/debug/hello.rp6502.
To share a program, build it with a Release preset, or the basic preset
for BASIC, and share that file, or its web player as described in
RP6502-WEB.
rp6502_executable() takes these keywords:
Keyword |
Description |
|---|---|
|
The address the program loads at. Without |
|
The address the 6502 starts running at, stored at
|
|
The address of the interrupt handler, stored at |
|
The address of the non-maskable interrupt handler, stored at
|
Each keyword takes a number, such as 0x200, or one of two words:
filetakes the address from the start of the linker output. Only llvm-mos writes addresses there: the load address, then the start address.defaultis0x200with cc65 andfilewith llvm-mos.
Use file and default only with DATA and RESET. Give
IRQ and NMI a number.
Adding Assets
Graphics, level data, help text and any other files the program uses are
packaged into the same .rp6502 file with rp6502_asset(). BASIC
programs are assets as well, as described in BASIC Programs.
rp6502_asset(hello RAM(0x00F0) bin/f0.bin)
rp6502_asset(hello XRAM(0x1000) img/tiles.bin)
rp6502_asset(hello help src/help.txt)
An asset with an address in RAM() or XRAM() is a memory chunk.
Before the 6502 starts, the file is loaded to that address in RAM, or in
XRAM, the 64 KB of extended memory outside the 6502’s address space
described in XRAM Memory Map. XRAM() takes the address the program
uses, and the bit that marks the address as XRAM is set automatically.
Inside the parentheses, the address is a number, the name of a CMake
variable, or a name read by rp6502_map() (see Addresses in CMake).
Any other address is a name, and a named asset is a file the program opens
while it runs. Prefix the name with ROM: and open it like any other
file. Named assets are read-only, and several can be open at once. To
load one into XRAM, pass its file descriptor to
read_xram().
open("ROM:help", O_RDONLY);
The asset named help is the ROM’s help text. An RP6502-PICO monitor
shows it with the HELP and INFO commands, and the emulator shows it in the
ROM Help window. The template’s help text is src/help.txt.
An asset can also be made by the build, such as an image converted from a
PNG. Create it with add_custom_command() and pass its output file to
rp6502_asset(). Both calls must be in the same CMakeLists.txt,
because CMake connects a generated file to the step that uses it only
within one directory.
find_package(Python3 REQUIRED COMPONENTS Interpreter)
add_custom_command(
    OUTPUT ${CMAKE_CURRENT_BINARY_DIR}/logo.bin
    COMMAND ${Python3_EXECUTABLE}
        ${CMAKE_CURRENT_SOURCE_DIR}/png2bin.py
        ${CMAKE_CURRENT_SOURCE_DIR}/logo.png
        ${CMAKE_CURRENT_BINARY_DIR}/logo.bin
    DEPENDS png2bin.py logo.png
    VERBATIM
)
rp6502_asset(hello logo ${CMAKE_CURRENT_BINARY_DIR}/logo.bin)
The build fails if two memory chunks overlap (“ROM data already exists”) or two assets have the same name (“Asset name already exists”).
Memory Map
Everything below $FF00 is RAM, and nothing in zero page is used or reserved. The Picocomputer starts every project as a clean slate. VGA, audio, storage, keyboards, mice, gamepads, the RTC, and networking are all reached through just the 32 registers of the RIA (the RP6502 Interface Adapter).
Address |
Description |
|---|---|
$0000-$FEFF |
RAM, 63.75 KB |
$FF00-$FFCF |
Unassigned |
$FFD0-$FFDF |
VIA, see the WDC datasheet |
$FFE0-$FFFF |
RIA, see the RIA datasheet |
$10000-$1FFFF |
XRAM, 64 KB, see XRAM Memory Map |
The unassigned space is open for experimenters. Design your own chip-select logic to use it.
Each compiler includes a linker script that lays out zero page and the rest of RAM, so a project does not have to manage the layout.
Most projects keep the default layout. For a different one, copy the
compiler’s script into the project, change the copy, and pass it to the
linker with target_link_options(). The scripts are cfg/rp6502.cfg
in the cc65 folder and mos-platform/rp6502/lib/link.ld in the
llvm-mos folder. With cc65, a script that moves the start of RAM needs
DATA and RESET given as numbers, because default is always
0x200.
# cc65:
target_link_options(hello PRIVATE -C ${CMAKE_SOURCE_DIR}/src/hello.cfg)
# llvm-mos:
target_link_options(hello PRIVATE -T ${CMAKE_SOURCE_DIR}/src/hello.ld)
The ld65 documentation describes the cc65 script format, and the llvm-mos wiki page Linker Script describes the llvm-mos format.
XRAM Memory Map
XRAM is 64 KB of memory outside the 6502’s address space. The preferred
way to read and write it from C is with the XRAM functions of the
API, such as xram0_read(), xram0_write() and
xram0_peek8(). The 0 or 1 in a name selects which of the two
XRAM portals of the RIA the call uses, and the
two portals can point to different addresses.
XRAM holds the data for the virtual devices: keyboard, mouse, tablet and gamepad input, the PSG and OPL2 sound generators, VGA mode configurations, and the pixels, tiles and sprites the modes draw. XRAM has no fixed map. You choose an address for each device’s data, and set it in the device’s extended register (XREG) with xreg().
A ROM’s map is usually kept in one file, xram.h for C or xram.inc
for assembly. It holds the structure of each device the program uses, and a
layout that places them in XRAM with a name for each address. Add a
device’s structure when the program starts using the device, and
rearrange the layout as the data grows. The template’s src/xram.h is
this file, with a placeholder structure, xram_feature_t, to replace.
The structures are in the RIA and VGA datasheets. Each one is
in a code block labeled xram.h or xram.inc, together with its
constants and XREG macros. Choose the C, ca65 or llvm-mc tab, then use the
“Copy to clipboard” button in the corner of the block to copy the whole
block into xram.h or xram.inc.
The structures are not part of rp6502.h or rp6502.inc. The copy
in xram.h is the only definition the program uses. This approach is
unusual, but the project depends on no submodule or shared header for
these structures, so changes to the SDK do not break its build, and the
whole map is in one file. Register numbers, field offsets and sizes never
change. Only names can change in the docs, and a name in the copy can be
changed without affecting anything else.
This example is for a program that uses only the keyboard. The keyboard
definitions are the Keyboard block from the
RIA datasheet, and the layout after them places the keyboard at
address 0. The types marked /* layout */ are the blocks a program
places in xram_layout_t and gives to an XREG.
#ifndef XRAM_H
#define XRAM_H

#include <rp6502.h>
#include <stdbool.h>
#include <stddef.h>
#include <stdint.h>

#define KEYBOARD_NO_KEY 0
#define KEYBOARD_NUM_LOCK 1
#define KEYBOARD_CAPS_LOCK 2
#define KEYBOARD_SCROLL_LOCK 3

#define KEYBOARD_PRESSED(keys, code) ((keys)[(code) >> 3] & (1 << ((code) & 7)))

#define xreg_ria_keyboard(...) xreg(0, 0, 0, __VA_ARGS__)

typedef struct
{
    uint8_t keys[32];
} keyboard_t; /* layout */

typedef struct
{
    keyboard_t keyboard;
} xram_layout_t;

#define XRAM_KEYBOARD offsetof(xram_layout_t, keyboard)

#endif
.ifndef XRAM_INC
XRAM_INC = 1

KEYBOARD_NO_KEY      = 0
KEYBOARD_NUM_LOCK    = 1
KEYBOARD_CAPS_LOCK   = 2
KEYBOARD_SCROLL_LOCK = 3

.macro xreg_ria_keyboard addr
    xreg 0, 0, 0, addr
.endmacro

.struct keyboard_t
    keys .res 32
.endstruct

.struct xram_layout_t
    keyboard .tag keyboard_t
.endstruct

XRAM_KEYBOARD = xram_layout_t::keyboard

.endif
.ifndef XRAM_INC
XRAM_INC = 1

KEYBOARD_NO_KEY      = 0
KEYBOARD_NUM_LOCK    = 1
KEYBOARD_CAPS_LOCK   = 2
KEYBOARD_SCROLL_LOCK = 3

.macro xreg_ria_keyboard addr
    xreg 0, 0, 0, \addr
.endm

KEYBOARD_KEYS = 0
KEYBOARD_SIZE = 32

XRAM_KEYBOARD = 0

.endif
Each XRAM_ name is the address of one part of the layout, and the
program uses these names for every XRAM address. This code maps the
keyboard to its address, then loops until a key is pressed.
xreg_ria_keyboard(XRAM_KEYBOARD);
while (xram0_peek8(XRAM_KEYBOARD) & (1 << KEYBOARD_NO_KEY))
    ;
    xreg_ria_keyboard XRAM_KEYBOARD
    lda #<XRAM_KEYBOARD
    sta RIA_ADDR0
    lda #>XRAM_KEYBOARD
    sta RIA_ADDR0+1
    lda #0
    sta RIA_STEP0
:   lda RIA_RW0
    and #1 << KEYBOARD_NO_KEY
    bne :-
    xreg_ria_keyboard XRAM_KEYBOARD
    lda #(XRAM_KEYBOARD & $FF)
    sta RIA_ADDR0
    lda #((XRAM_KEYBOARD >> 8) & $FF)
    sta RIA_ADDR0+1
    lda #0
    sta RIA_STEP0
1:  lda RIA_RW0
    and #(1 << KEYBOARD_NO_KEY)
    bne 1b
Addresses in CMake
An asset that loads into XRAM needs its address in CMakeLists.txt as
well as in the header. This layout adds a 2 KB logo after the keyboard.
Only the changed part of xram.h is shown.
typedef struct
{
    keyboard_t keyboard;
    uint8_t logo[2048];
} xram_layout_t;

#define XRAM_KEYBOARD offsetof(xram_layout_t, keyboard)
#define XRAM_LOGO offsetof(xram_layout_t, logo)
rp6502_map() reads the address names from the header, so each address
is written once, in the header, and never repeated in CMakeLists.txt.
rp6502_map(<target> <header> <regex> [<unaligned_regex>])
rp6502_map(hello src/xram.h "XRAM_.*")
rp6502_asset(hello XRAM(XRAM_LOGO) img/logo.bin)
The regular expression selects which #define names to read, and must
match the whole name. The value can be any constant expression, including
one built from another name, such as
#define XRAM_LOGO_ROW_2 (XRAM_LOGO + 64).
A name works only inside RAM() and XRAM(), in rp6502_asset()
calls for the target named in rp6502_map(). To read several headers
for one target, call rp6502_map() once for each. A name that two of
the headers define is a configure error.
When CMake configures, rp6502_map() compiles the header to assembly
with the same compiler as the program and reads each address from the
result, so the structures are laid out exactly as in the program.
Changing the header configures the project again on the next build,
so the addresses always match it.
rp6502_map() reads C headers only. For an assembly project, write the
address in RAM() or XRAM() as a number or as the name of a CMake
variable.
Alignment
Neither compiler pads structures, so each member starts right after the
one before it. Mode configurations, palettes and the PSG are read as
16-bit values, so they need an even address. Every address is checked,
and an odd one fails the build with an error on the line of its
#define.
Pixel data, fonts, tiles, sprite images, and the keyboard, mouse, gamepad and tablet blocks work at any address. They are checked anyway, because some hosts access them faster at an even address. To exempt names from the check, pass a second regular expression:
rp6502_map(hello src/xram.h "XRAM_.*" "XRAM_LOGO")
The build also fails if the layout is larger than the 64 KB of XRAM, or if an address does not fit in 16 bits.
Two requirements of the sound generators are not checked by
rp6502_map(). The 64 bytes of the PSG must not cross a page boundary,
and the OPL2 registers must start on one. A page is 256 bytes. The PSG and
OPL2 snippets in the RIA datasheet each define a check. Add the
line for each sound generator the program uses to xram.h, after the
XRAM_ names:
PSG_PAGE_CHECK(XRAM_PSG);
OPL_PAGE_CHECK(XRAM_OPL);
Multiple Compiler Artifacts
A cc65 program can load at more than one address, with one linker output
file for each, but CMake’s add_executable() tracks only one output
file. rp6502_byproducts() declares the other files a target’s build
writes. In a configuration for ld65, cc65’s linker, each memory area with
a file of its own is a separate output file, and %O stands for
the output file name that CMake passes to the linker.
rp6502_byproducts(<target> <file>...)
Microsoft BASIC loads at three separate addresses: the CHRGET routine
at $00E8 in zero page, the init code at $1000, and the interpreter
at $C000. Its linker configuration writes each one to its own file,
named after %O.
MEMORY {
    ZP:       start = $0000, size = $00E7, file = "";
    CHRGETZP: start = $00E8, size = $0018, file = "%O.00E8";
    INITROM:  start = $1000, size = $8000, file = "%O.1000";
    BASROM:   start = $C000, size = $3DDE, file = "%O.C000";
    # areas with file = "" write nothing; trimmed here
    TOUCH:    start = $0000, size = $0000, file = %O;
}
TOUCH is an empty memory area whose file is %O. The linker
writes it as an empty file, and CMake treats that file as the link
output. The three real files are declared as byproducts, added as memory
chunks at their addresses, and packaged:
rp6502_byproducts(basic
    ${CMAKE_CURRENT_BINARY_DIR}/basic.00E8
    ${CMAKE_CURRENT_BINARY_DIR}/basic.1000
    ${CMAKE_CURRENT_BINARY_DIR}/basic.C000
)
rp6502_asset(basic help src/help.txt)
rp6502_asset(basic RAM(0x00E8) ${CMAKE_CURRENT_BINARY_DIR}/basic.00E8)
rp6502_asset(basic RAM(0x1000) ${CMAKE_CURRENT_BINARY_DIR}/basic.1000)
rp6502_asset(basic RAM(0xC000) ${CMAKE_CURRENT_BINARY_DIR}/basic.C000)
rp6502_executable(basic RESET 0x1000)
rp6502_executable() has no DATA here, because the linker output
is the empty TOUCH file.
Multiple ROMs
Call add_executable() and rp6502_executable() once for each ROM.
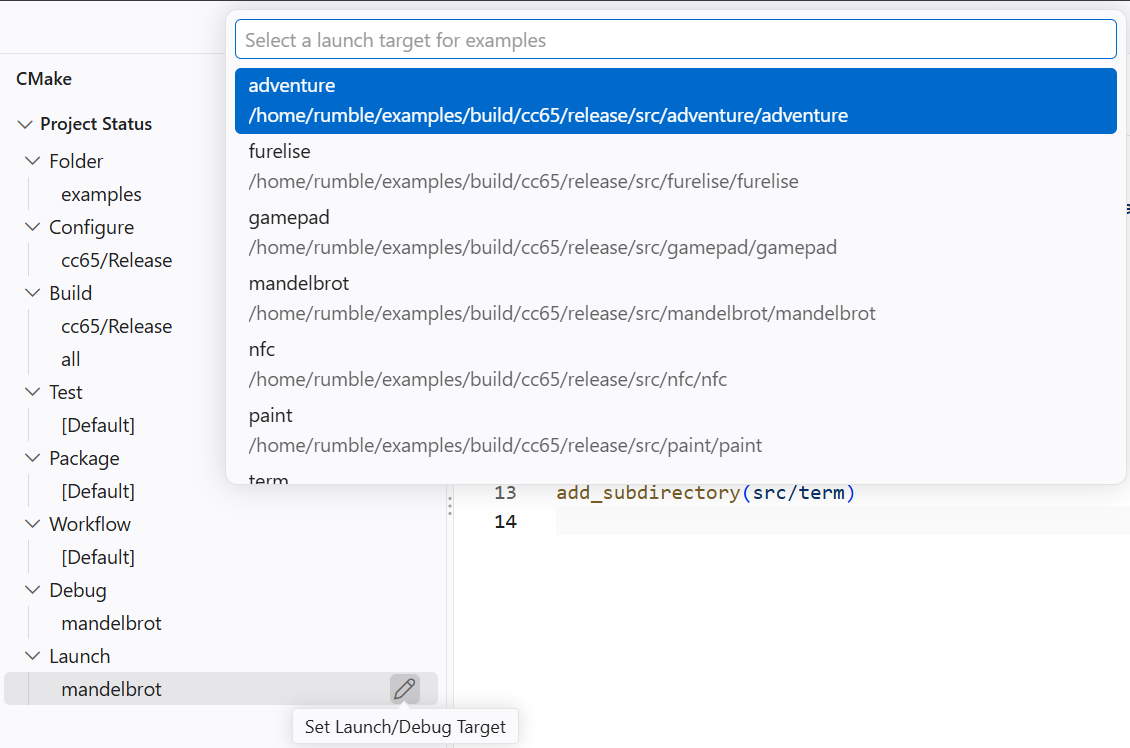
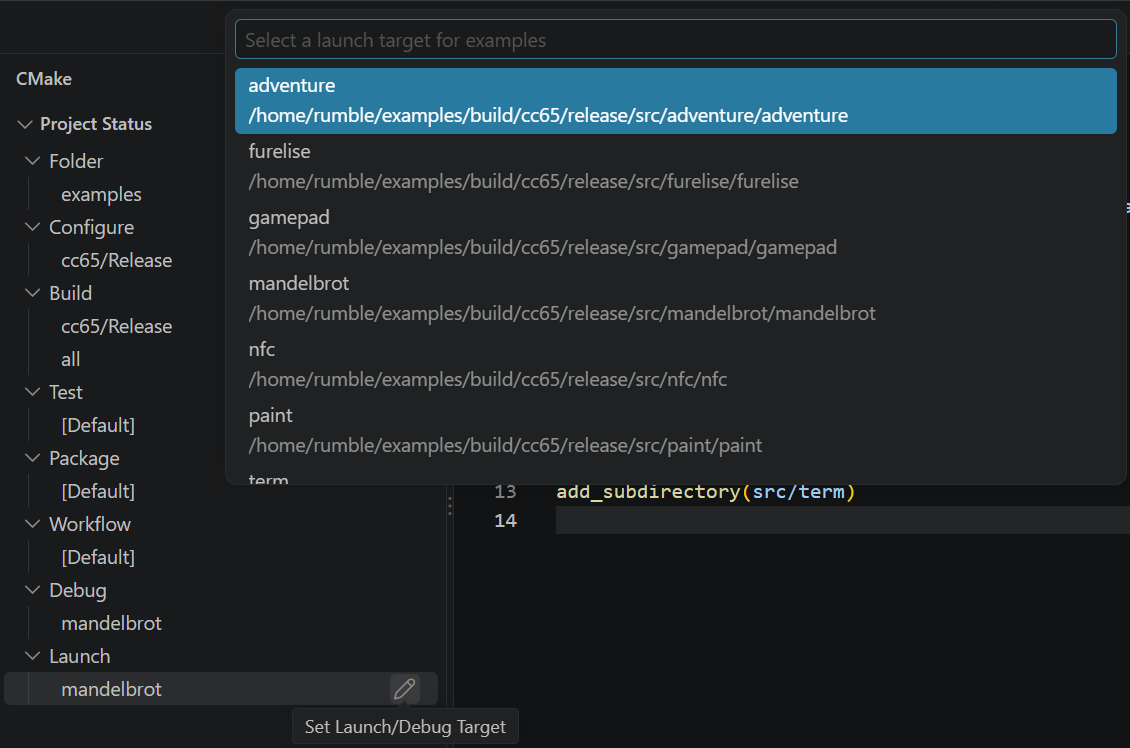
F5 runs the ROM selected as the launch target, in the Launch row of the
CMake side panel.
add_executable(hello)
rp6502_map(hello src/hello.h "XRAM_.*")
rp6502_executable(hello DATA default RESET default)
target_sources(hello PRIVATE src/hello.c)

add_executable(setup)
rp6502_map(setup src/setup.h "XRAM_.*")
rp6502_asset(setup help src/setup.hlp)
rp6502_executable(setup DATA default RESET default)
target_sources(setup PRIVATE src/setup.c)
rp6502_map() takes the target, so hello and setup can have
different XRAM layouts. Each ROM is built only after the checks pass for
every header mapped for it.
A larger project can give each ROM a directory of its own:
# CMakeLists.txt
add_subdirectory(src/hello)
add_subdirectory(src/setup)

# src/setup/CMakeLists.txt
add_executable(setup)
rp6502_map(setup xram.h "XRAM_.*")
rp6502_asset(setup help setup.hlp)
rp6502_executable(setup DATA default RESET default)
target_sources(setup PRIVATE setup.c)
Each ROM is written to the matching folder of the build, such as
build/cc65/debug/src/setup/setup.rp6502.
BASIC Programs
rp6502_basic() packages BASIC and the BASIC programs into one ROM.
Each program is an asset, added with rp6502_asset() as for a C
program:
cmake_minimum_required(VERSION 3.21)

include(${CMAKE_CURRENT_LIST_DIR}/tools/rp6502.cmake)

project(trek BASIC)

add_executable(trek)
rp6502_asset(trek instructions.bas src/instructions.bas)
rp6502_asset(trek game.bas src/game.bas)
rp6502_basic(trek instructions.bas)
A project like this one is built with the template’s basic preset.
At start, the asset autorun.bas is run if the ROM has one. Otherwise
BASIC starts at the OK prompt. The optional name after the target in
rp6502_basic(), instructions.bas above, is written into an
autorun.bas asset:
10 RUN "ROM:INSTRUCTIONS.BAS"
RUN with ROM: and an asset name loads and runs that program. The
name can be written in any case.
A project can add its own autorun.bas asset instead, and give
rp6502_basic() no name. That file is the place to set the input caps
mode with CAPS, and to print a message while a large program loads:
10 CAPS 0
20 PRINT "Loading..."
30 RUN "ROM:GAME.BAS"
rp6502_asset(trek autorun.bas src/autorun.bas)
rp6502_basic(trek)
CAPS 0 leaves typed letters as they are, CAPS 1 makes them upper
case, and CAPS 2 swaps upper and lower case. CAPS 1 is the
default. With both a name in rp6502_basic() and an autorun.bas
asset, the build fails with “Asset name already exists”.
The BASIC interpreter comes from the latest release of
picocomputer/msbasic. To
use a specific version instead, name it with BASIC, in any form
listed in Fetching BASIC and the Emulator:
rp6502_basic(trek BASIC build-96e229e instructions.bas)
The BASIC program is a CMake launch target, as a C program is, so F5 runs it in the emulator.
Web Players
rp6502_web() packages a ROM with the emulator and a page into a zip
that plays the program in a browser:
rp6502_web(hello)
The zip is web/hello.zip in the build folder, and the same files are
unpacked in web/hello/. In VS Code, choose “RP6502-WEB” in the Run
and Debug side panel and press F5: the project is built, and the browser
opens a page with a link to every web player in the build folder.
CONFIG in rp6502_web() sets the title, the footer and the other
settings of the page, and PAGE replaces the page with your own
index.html. Every setting, and how to write a page, is in
Building with CMake on the RP6502-WEB page.
Fetching BASIC and the Emulator
BASIC for rp6502_basic(), and RP6502-WEB for
rp6502_web(), are downloaded automatically into the build folder when
the project is configured. Each is the latest release of its official repository,
picocomputer/msbasic or picocomputer/rp6502, unless BASIC or
EMULATOR names another in one of these forms:
Form |
Description |
|---|---|
|
A release tag of the official repository. |
|
The latest release of a repository on GitHub. |
|
A release tag of a repository on GitHub. |
|
A file of the project, ending in |
A failed download is a configure error. To work without a network,
download the file, commit it with the project, and name it in
CMakeLists.txt:
rp6502_basic(trek BASIC tools/basic.rp6502 instructions.bas)
rp6502_web(trek EMULATOR tools/rp6502-web.zip)
Registers and volatile
volatile has no effect on the cc65 optimizer, so wrap C code that
accesses RIA or VIA registers directly in an optimize pragma:
#pragma optimize (push, off)
static void timer_start(void)
{
    VIA.acr = 0x40;
}
#pragma optimize (pop)
Command Line
The sections above use VS Code. This section covers building and running without it: on a build server, in another editor, or with a 6502 program from another toolchain.
Building
Each C preset is a compiler and a build type, and basic is for BASIC.
These commands list the presets, then configure and build cc65/Debug,
the same as choosing that preset in VS Code.
cmake --list-presets
cmake --preset cc65/Debug
cmake --build --preset cc65/Debug
The ROM is build/cc65/debug/hello.rp6502. The configure step
downloads the emulator when tools/ has none, so the first configure
of a fresh copy needs a network connection.
Running on an RP6502-PICO
rp6502.py run copies the ROM to the current folder of the monitor, or
to the workdir folder, loads it, and opens a terminal on the console.
In the terminal, Ctrl-A then X exits, and Ctrl-A then B sends a break.
The options of rp6502.py, such as -c, go before the subcommand,
and -c .rp6502 uses the settings file that VS Code uses.
python3 tools/rp6502.py -c .rp6502 run build/cc65/debug/hello.rp6502
Without a settings file, name the serial port with -d, or the host
and passkey for telnet with -d and -k. With -c, the settings
in the file take precedence over these options.
python3 tools/rp6502.py -d /dev/ttyUSB0 run build/cc65/debug/hello.rp6502
python3 tools/rp6502.py -d 192.168.1.20 -k secret run build/cc65/debug/hello.rp6502
Words after the ROM’s file name are passed to the ROM as its arguments.
rp6502.py has these subcommands. python3 tools/rp6502.py --help
lists the options that go before a subcommand, and --help after a
subcommand, as in python3 tools/rp6502.py execute --help, lists the
options of that subcommand.
Subcommand |
Description |
|---|---|
|
Copy a ROM to the USB drive, load it, and open a terminal. |
|
Copy files to the USB drive. With one file, |
|
Open a terminal on the console. |
|
Type a BASIC program into the BASIC installed on the RP6502-PICO, and run it. |
|
Run a ROM in the emulator. See Running in the Emulator. |
|
Start the emulator as the debugger for an editor. VS Code uses this. |
|
Package files into a ROM. See Packaging a ROM by Hand. |
|
Serve the web players in a build folder, and open a page in a browser with a link to each one. VS Code uses this. See Web Players. |
run, upload, term and basic send a break first, which
stops the program running on the RP6502-PICO.
Running in the Emulator
The emulator is tools/rp6502-emu, or tools/rp6502-emu.exe on
Windows and WSL. With no options, the ROM runs in a window.
Arguments in the emulator’s datasheet lists every
option.
tools/rp6502-emu build/cc65/debug/hello.rp6502
tools/rp6502-emu --headless --phi2 0 build/cc65/debug/hello.rp6502
tools/rp6502-emu --script tests/play.txt --seed 1 build/basic/trek.rp6502
With --headless, there is no window. The ROM’s console is the
terminal’s standard input and output, and the ROM’s exit code becomes the
emulator’s, so a ROM can run as a step in a script or a test.
--phi2 0 removes the speed limit.
With --script, the input comes from an emulator script, and the ROM’s output is checked against the script
instead of being written to standard output, so a program that reads the
keyboard can be tested. The exit code is 0 when the script passes and 1
when it fails. A BASIC ROM does not exit when its program ends, so run it
with --script.
rp6502.py execute is a wrapper for rp6502-emu --headless or
rp6502-emu --script that uses the emulator setting of
The .rp6502 Settings File, so -c is required. --phi2, --seed and
--save-dir are passed to the emulator. The ROM’s standard input is
empty, and the emulator’s exit code becomes the command’s exit code. The
second command below runs a BASIC program with a test script:
python3 tools/rp6502.py -c .rp6502 execute build/cc65/debug/hello.rp6502
python3 tools/rp6502.py -c .rp6502 execute --script tests/play.txt --seed 1 build/basic/trek.rp6502
Another editor can debug with the emulator through the Debug Adapter Protocol.
Packaging a ROM by Hand
rp6502.py create packages files into a ROM, and
rp6502_executable() uses it to build every ROM. Use it directly when
the 6502 program comes from a tool CMake doesn’t run, such as an
assembler that writes a linked binary. The options it takes are:
-a: the address to load the first file at, or the name of an asset;-r: the reset address, and-iand-nfor IRQ and NMI;-o: the ROM file to write.
The first file is the data to package. Every file after it must already be a ROM, and its contents are merged in. A ROM that holds only named assets is an input for merging and can’t be run, because it has no reset address.
This example packages an assembler’s binary that loads at $0400,
with a help file, a data file, and an image loaded into XRAM.
# The help text, as a named asset.
python3 tools/rp6502.py -a help -o help.rp6502 create plvm.help

# A data file the program opens as ROM:level1.
python3 tools/rp6502.py -a level1 -o level1.rp6502 create level1.dat

# An image loaded into XRAM before the 6502 starts.
python3 tools/rp6502.py -a 0x10000 -o splash.rp6502 create splash.bin

# The program at $0400 with a reset address, merged with the rest.
python3 tools/rp6502.py -a 0x0400 -r 0x0400 -o plvm.rp6502 \
    create plvm.bin help.rp6502 level1.rp6502 splash.rp6502
The result is plvm.rp6502. It holds memory chunks for the program at
$0400, the reset vector at $FFFC, and the image at $10000. It
also holds two named assets, help and level1.
ROM File Format
A ROM file is a shebang line, then one group of memory chunks, then any
number of named assets. Header lines are text and end with \n or
\r\n. Numbers may be written in decimal (255), C-style hex (0xFF) or
MOS-style hex ($FF). This is hello.rp6502 from the template, with the
binary data left out:
#!RP6502                         shebang
#>$000003AC $FB52BEE0            memory chunks, 0x3AC bytes follow
$0200 $37E $07A747B2             chunk: 0x37E bytes of program
$FFFC $002 $AFD773D3             chunk: 2 bytes, the reset vector
#>$0000006E $E047820E help       named asset: 0x6E bytes of help text
Shebang — the first line of every ROM file. The tools write:
#!RP6502
Any first line that starts with #! and contains rp6502, in upper
or lower case, is accepted. The first line can therefore name the program
that runs the ROM. A ROM file marked executable then runs from a shell
when that program is on the PATH:
#!/usr/bin/env rp6502-emu
Memory chunks — the line after the shebang starts the group of memory chunks, which are loaded into RAM or XRAM before the 6502 starts:
#>len crc
len is the number of bytes that follow in the group, counting each
chunk’s header line as well as its data, and crc is the CRC-32 of
those bytes. Each chunk is a header line followed by its data:
addr len crc
Field |
Description |
|---|---|
|
Destination address in RAM ( |
|
Number of bytes of binary data that follow this line. At most 1024, and a chunk may not cross a 64 KB boundary. |
|
CRC-32 of the binary data. |
Named asset — a file the program opens by name while it runs:
#>len crc name
The line is followed by len bytes of binary data. Named assets repeat
to the end of the file.
Field |
Description |
|---|---|
|
Number of bytes of binary data that follow this line. |
|
CRC-32 of the binary data. |
|
The asset’s name. |
The CRC is CRC-32 as zlib and PNG compute it. The format sets no limit on
the number or size of named assets. Opening ROM: plus a name reads
each asset header in file order and skips its data, so a ROM with many
assets takes longer to open the last ones.
Upgrading an Older Project
Because volatile has no effect on the cc65 optimizer, the macros of
rp6502.h that accessed RIA registers directly were replaced by
library functions. The compilers installed by the commands in
Installing the Tools have the change. This table lists the changes
that break an older project.
Old |
New |
|---|---|
|
|
|
|
|
|
|
The same macros from the RIA datasheet, copied into
|
|
The same macro from Key Registers, copied into
|
|
One macro per mode from the VGA datasheet,
|
|
|
|
|
|
|
|
None. Each API call has a C function, listed in the API.
The ARGV arguments are passed to |
|
None. |
|
|
An assembly macro, or a ca65 label, named |
|
For an older C project, save this header in the project, and include
"rp6502-compat.h" in place of <rp6502.h>:
#ifndef RP6502_COMPAT_H
#define RP6502_COMPAT_H

#include <rp6502.h>
#include <stddef.h>

#define RIA_READY_TX_BIT 0x80
#define RIA_READY_RX_BIT 0x40
#define RIA_BUSY_BIT 0x80
#define RIA_OP_ZXSTACK RIA_OP_DROP_XSTACK

#define phi2() ((int)ria_attr_get(RIA_ATTR_PHI2_KHZ))
#define code_page(cp)                                                    \
    ((cp) ? (void)ria_attr_set((cp), RIA_ATTR_CODE_PAGE) : (void)0,      \
     (int)ria_attr_get(RIA_ATTR_CODE_PAGE))
#define lrand() ria_attr_get(RIA_ATTR_LRAND)

#define xreg_ria_keyboard(...) xreg(0, 0, 0, __VA_ARGS__)
#define xreg_ria_mouse(...) xreg(0, 0, 1, __VA_ARGS__)
#define xreg_ria_gamepad(...) xreg(0, 0, 2, __VA_ARGS__)
#define xreg_ria_tablet(...) xreg(0, 0, 3, __VA_ARGS__)
#define xreg_vga_canvas(...) xreg(1, 0, 0, __VA_ARGS__)
#define xreg_vga_mode(...) xreg(1, 0, 1, __VA_ARGS__)

/* Bit tests, not ==, avoid a cc65 warning about constant comparisons.
   The casts avoid conversion warnings from the unused branches. */
#define xram_struct_set_(n, a, size, v)                                  \
    ((size) & 1 ? xram##n##_poke8(a, (unsigned char)(v))                 \
     : (size) & 2 ? xram##n##_poke16(a, (unsigned)(v))                  \
     : (xram##n##_poke16(a, (unsigned)(v)),                              \
        xram##n##_poke16((a) + 2, (unsigned)((unsigned long)(v) >> 16))))
#define xram0_struct_set(addr, type, member, val)                        \
    xram_struct_set_(0, (unsigned)(addr) + offsetof(type, member),       \
                     sizeof(((type *)0)->member), val)
#define xram1_struct_set(addr, type, member, val)                        \
    xram_struct_set_(1, (unsigned)(addr) + offsetof(type, member),       \
                     sizeof(((type *)0)->member), val)

typedef struct {
    unsigned char x_wrap, y_wrap;
    int x_pos_px, y_pos_px, width_chars, height_chars;
    unsigned xram_data_ptr, xram_palette_ptr, xram_font_ptr;
} vga_mode1_config_t;

typedef struct {
    unsigned char x_wrap, y_wrap;
    int x_pos_px, y_pos_px, width_tiles, height_tiles;
    unsigned xram_data_ptr, xram_palette_ptr, xram_tile_ptr;
} vga_mode2_config_t;

typedef struct {
    unsigned char x_wrap, y_wrap;
    int x_pos_px, y_pos_px, width_px, height_px;
    unsigned xram_data_ptr, xram_palette_ptr;
} vga_mode3_config_t;

typedef struct {
    int x_pos_px, y_pos_px;
    unsigned xram_sprite_ptr;
    unsigned char log_size, has_opacity_metadata;
} vga_mode4_sprite_t;

typedef struct {
    int transform[6];
    int x_pos_px, y_pos_px;
    unsigned xram_sprite_ptr;
    unsigned char log_size, has_opacity_metadata;
} vga_mode4_asprite_t;

typedef struct {
    int x_pos_px, y_pos_px;
    unsigned xram_sprite_ptr, palette_ptr;
} vga_mode5_sprite_t;

#endif /* RP6502_COMPAT_H */
The header does not replace ria_push_*, ria_pop_*, ria_set_*
and ria_call_*. Change those calls as the table shows.